Quantcast
Channel: Recreation – The Survival Place Blog
Viewing all 77 articles
Browse latest View live

Ice Fishing Part 1: Basics and Pole Fishing

$
0
0

Ice_Fishing

By

Finding food in winter can be difficult as most forage has rotted away or been stripped by hungry animals. However, beneath the frozen surface of many lakes lies a bounty of delicious fish swimming slowly near the murky bottom. The specialized techniques of ice fishing can help you tap into this food source, if you have the proper tools.

The Essentials

For ice fishing you can’t just find a convenient hole and plop down your standard pole and line, you need certain tools designed for ice fishing. These include:

A manual augur like this one is extremely useful for punching through thick ice.

  • Ice fishing pole. These are different from standard poles, as they are shorter and designed to give you a better feel for the lighter tugs of lethargic, half-frozen fish. Technically you can fish with a regular pole if all else fails, but ice poles are fairly cheap and the inconveniences of using the wrong kind of pole can result in unacceptable lost catches.
  • The skimmer. This is essential, as this tool is needed to scoop out rubble from drilled holes and to pull out ice as it begins to form over your new fishing spot. Essentially a sieve with a long handle, skimmers are generally very cheap and you would do well to stock several for emergency use.
  • For true survival fishing, a convenient tool known as a tip-up could be a lifesaver. Basically it is a contraption that allows for passive fishing, since it will help hold the fish on the line for you until you have the chance to investigate. They are often equipped with flags or bells that activate when the line on the tip-up is pulled, and you can easily setup multiple ice holes with tip-ups for maximum fishing efficiency.

Optionally you can also purchase or build an ice hut, which is a mobile building designed to be placed over an ice hole in order to block the wind and snow for additional comfort. Although this would be helpful in reducing instances of frostbite or hypothermia, it also leaves a much more obvious footprint while it is present which could tip off other people to your presence.

How to ice fish

Ice fishing is generally pretty simple once you have the process down. There is an element of risk, however if you do not take the proper precautions.

  1. Select a lake. Generally speaking you will need at least 4 inches of solid ice in order to have sufficient thickness to stand on it for a long time and fish. If you have a heavy wooden shelter, you will require roughly 7-12 inches of solid ice. Beware of ice with the proper depth that is extremely fragile and crackly, known as “rotten ice”, that can give way even with proper thickness. In a pinch, many fishermen will use rotten ice that is twice as thick as normal ice, so a person would need 8 inches of rotten ice and a wooden shelter 14-24 inches. I would not recommend fishing on rotten ice, period as the danger during a survival situation is far too great. A 6 inch hole will do you just fine.
  2. Set your bait and put your line down into the hole. Baits in frozen waters are generally artificial, as the chill will rapidly slow worms and grubs. When setting the depth of your bait, there are 3 schools of thought. First, you should place the bait about 3 feet below the ice. Second, place the bait about 6-9 feet below the ice. Thirdly (and most commonly) place the bait a couple feet above the bed of the lake. Each of these techniques are suitable for various kinds of fish, but many will allow that the lakebed is often teeming with fish when compared to the upper layers making it a good safe bet.
  3. Wait. Ice fishing is no different from fishing in warmer seasons. You will have a lot of waiting to do on the ice as you feel for the light tugs of the fish. Be aware that most fish in frozen lakes are very lethargic and they will not tug as sharply on your hook as you may be used to.
  4. Once you have a fish on the line, allow it to fight until you can easily pull its head into the ice hole. You don’t want to be trying to fight the fish in the hole if possible, so let it tucker itself out in the open waters underneath. Once it is in the ice hole, pull it out rapidly onto the ice so that it doesn’t get caught in the hole.
  5. Enjoy your fresh catch! Typical ice fish treasures include pan fish (which as we’ve noted previously are also less likely to ingest poisonous materials)

In the next installment we will discuss using a tip-up, as well as the different kinds available on the market. Until then, you can use these techniques to collect a nice batch of fish for the pan even in a winter survival situation. - Prepared For That

Your Thoughts?

Have you ever ice fished before? Would you be willing to walk out onto the ice and drill away for a meal? Let us know in the comments below!


Top 10 Training Courses You Should Take Right Now

$
0
0

training-courses-header

By Brian Meyer

Prepping is more than having a room full of food and supplies, it’s also about skills. All the food, weapons, and supplies in the world will only get you so far if you don’t have the skills for survival. A first-aid kit is great, but if you don’t know how to perform first aid, it loses most of its usefulness.

There are classes available all around the country that help with learning the skills needed for survival, and most aren’t even listed as survival, but just as quality of life skills everyone should know. Check out the list of the top ten training courses you should be taking right now and learn a new skill.

1. Red Cross First Aid and CPR

 red-cross-training

These classes can literally be a lifesaver. Taking a first aid class can give you the skills you need to survive and not only help yourself but also help others.

The class involves learning how to respond to common first aid emergencies including burns, cuts, and injuries to the head, neck, and back. If you have kids there is a pediatric version available, too.

Along with first aid are classes on CPR. These can help teach you the proper way to give someone CPR, or cardiopulmonary resuscitation. Trying to do this without the proper knowledge is a good way to kill someone, so make sure you take the time now to learn the proper way.

2. LDS (Mormon) Canning Classes

canning-skills

No matter your religious beliefs, the Mormons are often glad to help teach the art of preserving and canning food. The storing of food for emergencies is a belief they hold closely, so it’s no wonder that they are skilled in the art of canning.

Visit a LDS Cannery close to you for classes and information. Most are free and open to the public with an appointment. Check out this site for a list of LDS Cannery locations.

3. ARRL Amateur Radio

amateur-radio-survival

When the SHTF it’s not likely that there will be cell phone or even landline service for the foreseeable future, which means alternate forms of communication will be vital to survival.

Learning the art of amateur radio operation now can give you an interesting hobby as well as give you the skills you need to communicate in grid-down situations. The ARRL association for Amateur Radio is a great place to learn what you need to be skilled at using amateur radios as well as get certified so you can legally operate one today.

4. NRA Gun Training

 nra-gun-class

The National Rifle Association, or NRA, offers a variety of gun classes ranging from basic gun training and hunting, to youth programs and even gunsmithing. If you’re serious about security and safety in regard to firearms, these should be the classes you take.

Having a gun isn’t enough to protect you and your family. You need to know how to use it safely and correctly as well. Learn these skills now and you’ll be much better off when you need to use them.

5. Spinning/Weaving Classes

spinning-weaving

In a survival situation it’s a pretty safe bet that the Wal-Marts and malls will be out of business. This means any clothes you need will have to come from yourself or bartered for. Learning how to make your own clothes and to do repairs on the ones you have is just as necessary as any other skill you prepare to use.

There are tons of local clubs and community college classes that will teach this, so your best bet is to look at the local community college or community center for a class. This will probably cost a few bucks, but it’ll be money well spent.

6. Candle and Soap Making

candles-soap

Making your own candles and soaps can be a fun hobby to have, and can even be a great gift idea for friends and family. The best part about this is that when the SHTF you’ll be able to make your own soap and candles to keep you and your family clean and well lit.

You can learn how to make soap and candles from sites on the Internet as well as at local craft stores.

7. Gardening Classes

garden-club

In long-term survival situations you’ll need to know how to grow a variety of fruits and vegetables to keep your food supplies stocked. You can even use these skills now to help build up your food stores by canning the leftovers.

These classes and clubs should be fairly easy to find by checking out a local community center or community college. There are more than enough books and sites on the Internet about gardening as well. National Geographic even has a special on how to make a secret, hidden survival garden, a real plus for survival situations where you want your food hidden.

8. Backpacking Club

backpacking

Knowing how to properly backpack and camp is a skill that will be invaluable in survival situations. There is far more to backpacking that walking around the woods with a large backpack on. By joining a backpacking club you can gain skills and information that you might not pick up on by reading alone. Best of all, you get to talk to other backpackers and see what skills they have.

Check out local community centers and outdoor shops for information on clubs and classes. Some retailers will offer classes free of charge to members or even the general public.

9. FEMA/CERT Training

fema-cert-training

FEMA/CERT training is what people that do emergency response and rescue take to make sure their skills are up to any challenge. These are great for the average prepper, too, as you will need to be your own emergency response unit when things go bad.

Check out FEMA’s website for more information and training manuals. These should be a great place to start.

10. Shop Class for Adults

adult-shop-class

Most community colleges offer some form of shop class or industrial skills class that you can sign up for and take. These usually cost a fee, but in them you can learn everything from welding to auto repair to woodworking.

Take as many of these classes as you can, as the money you invest will come back to you in both the short and long term. Immediately you can use these skills to help around the house and in the future you can not only care for your own house, but also barter and trade your skills to get things you need while helping your neighbor.

Wrap-Up

There are probably a hundred more skills you can learn to help survive, but these are a great place to get started. Too often prepping with food, weapons, and general supplies overshadow the most important part of a survival plan: yourself.

Improve yourself as much as you can now while information is easily accessible. When things get bad, you’ll have a much harder time finding someone to teach you these skills, and the thought of using the Internet to find your answers will be a dream. - Survival Based


10 Drills To Make You A Skilled Concealed Carrier

$
0
0

concealed carry drill

By Ben W

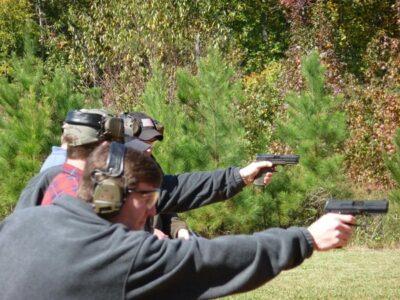
You’ve chosen to carry a weapon concealed for your personal protection and that of your family.  But you’ve eschewed specialized training and chosen instead to rely upon your personal knowledge, the stuff you have read in written self-defense and firearm publications, and the common sense that has gotten you to this point in the first place. After all, mama didn’t raise a fool. You’ve been pretty successful at staying alive to this point, so the following is intended as a basic guideline to enhance your current set of skills.

The following is what I call the 30-round defensive shooting scenario. Grab an IDPA target, 60 or 90 rounds and get to the range. If you can get someone to time your shooting, it’s helpful (specifically if they have a stopwatch or a competition timer). This helps keep you on your toes and gives you effective training.

This type of training is a live-fire exercise and should be performed where you can shoot without concerns for safety (and only after you are confident in your safety protocols). You can perform these drills with a revolver or a semi-auto handgun. Just make sure to have reloads to practice that aspect of your defensive shooting.

Drill 1

Take a position at 5 yards with a low-ready position (unholstered). This drill is not to specify that you ought to use a headshot at this range, but rather to help you learn target acquisition at a short range quickly and with a good focus and size range. You will want to shoot within 1.5 seconds to hit the target in the triangle or head region from a ready position. Repeat the shot 3 times to get comfortable with it before moving on.

Drill 2

Position at 5 yards with a 2-second window from a holstered, semi-ready position to simply focus on drawing and firing at the triangle (the area in the upper chest to nose region), or the headshot. Same area of focus (triangle/head) and you will also repeat this for a total of three shots.

Keep Your Handgun Locked and Loaded, Ready For Instant Use – Without Fear Of An Accident!

Drill 3

At 5 yards again, in a single-handed, strong hand, low-ready position, fire a double tap to the body within 2 seconds.  The goal is to ensure that you can instinctively shoot to eliminate a threat. You will focus on taking a two-shot action to the body, and repeat the process for two times (6 shots total).

Drill 4

At 7 yards, turn so that the target is to your right side at 90 degrees.  This is to react to a threat coming from your side and to help you establish balance and reactive measures to such an attack.  You will have 2 seconds to fire a double tap to the body from a holstered position. Shoot this drill once.

Drill 5

A reverse of drill No. 4, you will be facing 90 degrees turned away from the target, with the target to your left side. You will try to shoot a double tap on the body area within 2 seconds from a holstered start. Shoot one time.

Drill 6

At 7 yards, perform a double tap from a holstered position to the target with a 2 second time limit.  Shoot once.

Drill 7

At 7 yards, take four seconds maximum to make three body shots in succession, while moving rearward away from a target as though distancing yourself from the attack threat.  Shoot 3 shots 2 times. You will want to back away five retracing steps to about 10-12 yards away.  The goal is to maintain the sight picture and point of impact for the target to keep groupings tight and centered to the low chest/center mass, starting at the ready position.

Drill 8

At a distance of 10 yards, you will have a loaded chamber. Drop your magazine and then fire your round at the target.  Within a 3-second window you should be able to drop the magazine and then deliver your shot on target to the body without concerns.  For those who use revolvers for self-defense, do not underestimate the importance of speed reloading in defensive scenarios.  There are only 3 seconds, so get to the point where you can make a speed reload on an empty revolver (AND a full cylinder of empties).

You cannot rely on the idea that just because it may not be as easy to reload a revolver under stress that there will be concessions for it.  You must do this; it’s the most important drill in the scenario for wheel-gun shooters. Repeat 2 times with a single shot.

Drill 9

From a distance of 10 yards with an open and locked slide, reload a magazine and load the chamber from the top of the new magazine to fire a single shot to the body in less than 3 seconds.  Shoot this only once.  Revolver shooters, practice by loading an open unloaded cylinder and with fresh rounds.

Drill 10

From a holstered weapon draw and fire within 2.5 seconds. Repeat 5 times.

All 10 drills will combine for a shot total of 30. You should be practicing real technique and looking to improve timing and holster control, as well as accuracy. Sight acquisition is an important factor in these drills; try doing it dry, without ammunition, to determine if you have the fundamental control and ability to do it in that time frame to begin with.  Establishing a base level idea of your capabilities will help in the process of improving.

Repeat all 10 drills as a single set at least 3 total times per range trip until you are fully comfortable with the drills.  Using 90 rounds (3 sets of 30 rounds as listed above) per 250 or so that you shoot until you get to a state of comfort and proficiency is an excellent rule of thumb.  These drills are ALL ABOUT de-holstering and coming ready with a target coming towards you.

To make the task more difficult, use scoring zones to test your proficiency. Specifically, headshots might only count if you can hit in the center section. The first 3 inner rings might be the only ones that count for the body shots.

Use the same gun you carry, and do it with your carry ammunition at least once (preferably at the end of training, when you are already proficient).  You will want to use a concealed carry holster, not a duty holster or a competition shooting holster. The goal is to eventually get to a point where you can meet the time constraints and hit the correct areas, but mostly, you want to maintain comfort, control, and sight picture under stressful situations.  The ability to do these drills in non-stress situations means very little; you need to perfect your skills under circumstances more like those you might face while the subject of an attack and where you will have to defend your life. – Off The Grid News


Ice Fishing Part 2: How to Build and Use a Tip-Up

$
0
0

Tip-up

Read the entire series! Part 1

 By Josh

Previously we discussed some of the methods commonly used for ice fishing when you have the luxury of being there and tending to the line. In this post, we’re going to look at how to build and use a tool known as a tip-up that helps to “watch” your fishing hole for you.

Many designs, but all with a similar principle

The basic idea of a tip-up is a mechanism that can do two things:

  1. Hold onto your line for you until a fish grabs it, whereupon it will spool line off of the reel.
  2. Once a fish begins pulling on the line, it will tip up a flag, ring a bell, or give some other indication that a fish is on the line.

Any contraption that you can build and put on the ice that accomplishes these two tasks will suffice for a tip-up. You can setup multiple tip-ups at different areas and depths in the lake or pond in a survival situation, but be aware that in any other case your local government may have a limit on how many you can have working a single lake.

Tip-ups have the advantage of only requiring your help to keep the ice hole clear and to pull in fish once caught. The disadvantage is that you may lose stronger fish that could have been easily caught with a manual fishing style, and tip-ups are fairly obvious indications of human presence complete with obvious flags and ringing bells. If you’re trying to be discrete and only need a few fish at a time, stick with the pole but if you need large amounts of fish tip-ups increase can vastly your catch.

Types of Tip-Ups

Beaver_Dam_Tipup

  • Rectangular Tip-Ups (sometimes known as a Beaver Dam design) lie flat on the ice above the hole and have string wrapped around a small spool that is actually placed into the hole. As the spool turns, it loosens the flag until it tips up and alerts you. These are simple to make at home and extremely stable on the ice, but they do tend to get lost if snow actually drifts over the lake. For a preparedess minded person, they have a low profile that is easy to hide when the flag isn’t up, making them very discreet.
  • The rounded hole tip-up design actually fits in the hole and uses a similar spool spinning mechanism to the Rectangular tip-ups. The key difference here is that since the device itself is placed at the top of the hole it can help keep it from freezing over in the short term, though some fishermen have complained that if left for a day or more they can freeze in place overnight, making them difficult to remove without damaging them.
  • The “Classic” design is one that is extremely light, simple and portable. Made of three pieces of wood held together with butterfly nuts, the classic is unfolded by loosening the nuts and formed into a rough “T” shape. Rather than relying on the spinning motion of the spool, the flag is released when the line is pulled off of a hook by the fish, releasing the flag to tip-up and become visible. These are generally very cheap to purchase, easy to setup, and extremely portable. However, they can be toppled over if improperly setup and do not keep the hole clear.

Each of them has different uses and all are suitable for a survival situation. If purchasing I recommend focusing on durability since these tip-ups tend to be made of portable, light materials such as thinner wood and plastic that can break easily on lower quality models. If properly cared for, however, a durable tip-up can last for many fishing seasons and provide you with a bounty of fish. – Prepared For That

Your Thoughts?

Would you buy a tip-up or build one for yourself? Would you use a tip-up in the first place? Let us know in the comments below!


Selecting the Right Compass

$
0
0

compass

By Jeremy Knauff

The compass has been a tool of great importance for centuries. Every navigator considered it a crucial part of his or her arsenal, and for good reason. The world is a big place, after all, and one can become easily lost without the ability to find the four cardinal points. As technology has evolved the compass has seen various adjustments in size, utility, and efficiency. Today’s mobile phones are even capable of performing the duty of a compass. A wise route-finder, however, will want to recognize that such a medium is readily prone to elemental damage. Real compasses are still the most reliable option. There are three traditional archetypes available for staying on course today:

Lensatic compass

Lensatic CompassThe most robust style on the market; a lensatic compass can withstand formidable abuse. The majority come with aluminum framing—preventing rust—and particularly durable plastic protecting the instrument itself. Adding to the virtual immunity to elemental damage, these models often offer photo-luminescent technology enabling visibility in low-level lighting conditions. The lensatic sight can also be used to determine an objective’s exact bearing. This is the most dependable model for the survivalist – made apparent by its ubiquitous tradition amongst armed forces units. These benefits do not come without a price, however, as the user must sacrifice utility for a rather unwieldy size. This is not a compass that can be tightly compacted and slipped into a small space. Though its immense utility certainly makes up for any shortcomings.

Map compass

Map CompassThe map compass is very refined and primarily designed to permit extreme precision. These models tout a protractor feature and a transparent base. When used in conjunction with a map, the protractor enables a taking of bearings directly from the paper itself. The rectangular shape can make this model cumbersome if it becomes awkwardly positioned in a large pocket, but its flattened side-profile certainly offers advantages of its own – permitting storage in tight pouches. Nearly all models of map compass will have a lanyard; this permits an easy method of attachment via jacket button holes or belt loops whilst carrying.

Compact compass

Compact CompassThe advantage of a compact compass is that, by its very nature, it is designed around being easy-to-store and carry with you. The quality isn’t going to be nearly so great as the other options, but will be quite sufficient for the novice outdoorsman, or suburban enthusiast. The main function of this model is to provide you with an ordinary bearing, and it performs that function adequately. With the compact compass there is no ability to finely determine direction, but that is seldom a problem for those who are engaging in day trips of no more than a few miles, occasional campers, or hunters.

The type of compass you choose will be entirely up to your individual requirements. There are numerous models available that almost universally fall into one of the three above-listed varieties. Each has their strengths and weaknesses, but all are effective. – How To Survive It


5 Prepping Skills You Can Learn From Zombie Movies

$
0
0

zombie-survival-header

By Brian Meyer

Everyone loves a good zombie movie. With zombies on TV, in the movies, and just about everywhere else, you might suspect that the zombie apocalypse has already started.

In reality, though, zombies are just a work of fiction. There are more than enough scenarios out there to worry about that actually have a chance of happening. There are some people out there prepping for just such an outbreak, but while this is pretty far-fetched, there are some solid prepping skills to be learned from zombie preppers and zombie movies.

1. Weapons

zombie-survival-weapons

If you’re familiar with zombie movies or TV shows like The Walking Dead you know that ammunition will run out at some point. The big difference between movies and real life here is that the starts of the movie pick up hand weapons and just magically know how to use them, the truth couldn’t be farther from this idea.

Learning any weapon takes time and practice. Too many preppers spend all their time learning how to shoot and ignore bladed and blunt hand weapons. Learn how to properly wield a machete, sword, or even a basic knife if a self-defense class and you’ll be much better rounded in any situation that a weapon is needed.

With learning hand weapons, make sure you learn all there is about firearms as well. A good reloading class can mean the difference between having ammo and running out. Guns are still important, but other weapons can be just as necessary, especially when the ammo runs out.

2. Mobility

zombie-survival-mobility

If you subscribe to the slow, lumbering zombie idea then you know that zombies generally only kill people when they let themselves get cornered or don’t have a good escape plan. Even though the real risk of zombies is pretty low, this idea is still important.

You need to know how to escape where you currently are, and should have at least two ways of doing it. Make sure you can be mobile as quickly as possible using both motorized and foot travel.

Keep all of your gas tanks as full as possible during daily use. You don’t want to be running from zombies or looters in a car with an empty fuel tank. When things go bad, you don’t want to be one of those people waiting in line at a gas station, fully open to attack. In an emergency where cars still work gas equals freedom and safety.

3. Defense

zombie-survival-defense

Some say the best offense is a good defense, and in this situation it’s totally correct. Zombies are fairly silent when alone, which makes it easy for them to sneak up on unsuspecting survivors and bite them. The same goes for looters and other people that can harm you or your family, minus the biting, maybe.

Wherever you are, set up a good perimeter defense and warning system. Make sure there’s at least something to warn you of attack. That could be trip wires tied to cans that rattle, or someone watching a road for travel on it. Ideally a combination of these is the best option.

Make sure you have a defense plan before you need to enact it, too. Think of the situation like you were a zombie or looter and think how you would approach. BE aware of what direction civilization is, as most people will come from that direction, and always look behind you.

4. Operational Security

zombie-survival-opsec

In this situation OpSec is less about letting others know your plans and more about protecting what you have. Don’t let your full defenses show unless absolutely necessary. Keep as quiet as possible and keep warning signs like smoke as invisible as you can.

In the movies a zombie can easily hear for a mile and will alert his friends that there’s a buffet waiting for them. The same goes for regular people in survival situations, too. If you’re in a valley that carries sound, you should be aware of that. You’ll need to make a fire at some point, so try to hide the smoke as much as possible.

Keep yourself and your survival as close to the vest as possible and less people will know you’re out there, which is a good thing no matter if the other people are alive or the walking dead.

5. Water and Food

zombie-survival-food

There isn’t a disaster scenario in which water and food isn’t important. The CDC even has a zombie preparedness page that, while far-fetched, has valuable information in it. In a zombie outbreak, water and food supplies could become tainted, making it very valuable for you to have your own saved up.

Replace “zombie outbreak” in that sentence with any other disaster and it still rings true. You should make a survival plan and store up enough food and water to work around that plan.

Natural disasters happen a little more frequently than zombie outbreaks, so planning food and water to get you through one of these is the best idea, and it’ll even help with zombies. Just like with having a full gas tank, you don’t want to be that person running for the grocery store when something bad happens. When times get tough most people get ruthless, and honestly, almost zombie-like. Keep yourself out of a potentially bad situation and have your water and food stores already set before you need them.

Wrap-Up

The idea of the dead walking the streets looking for brains to eat is indeed a scary idea, and for the sake of preparedness you shouldn’t rule anything out, but you’re far more likely to be in a survival situation with less supernatural beginnings and more explainable ones. This doesn’t change the need for prepping, however.

If you want to prep for a zombie outbreak, I say go for it, as long as you’re planning smartly and with other scenarios in mind, you’ll be as safe as possible. – SurvivalBased


SURVIVAL – How To Survive

$
0
0

definition-of-survival

By Ken Jorgustin

To survive under difficult or threatening circumstances requires a set of instincts, knowledge and actions working together for success.

Don’t be fooled into thinking it’s a simple thing…
 
S ize Up the Situation
Size Up the Situation, Surroundings, your Physical Condition, and your Equipment.

U se All Your Senses, Undue Haste Makes Waste
You may make a wrong move when you react quickly without thinking or planning.

R emember Where You Are
Always try to determine how your location relates to ‘the enemy’, ‘friendlies’, local water sources, and areas that will provide cover.

V anquish Fear and Panic
The greatest enemies in a survival situation are fear and panic.

I mprovise
No matter how complete a survival kit you have with you, it will run out or wear out after a while. Your imagination must take over when your kit wears out.

V alue Living
Stubbornness, a refusal to give in to problems and obstacles that face you, will give you the mental and physical strength to endure.

A ct Like the Natives
The natives and animals of a region have adapted to their environment. To get a feel of the area, watch how the people go about their daily routine. Learn how to adapt to their (humans and animals) environment and increase your chances of survival.

L ive by Your Wits, But for now… Learn Basic Skills
Survival training reduces fear of the unknown and gives you self-confidence. It teaches you to live by your wits. Learn these basic skills now–not when you are headed for or are in the ‘battle’.

 
Pattern For Survival
Develop a survival pattern that lets you beat the enemies of survival. This survival pattern must include food, water, shelter, fire, first aid, and signals – placed in order of importance.

For example, in a cold environment, you would need a fire to get warm, a shelter to protect you from the (cold, wind, and rain or snow), a means to get food, a means to signal for help (if you’re looking for it), and first aid to maintain health.

If injured, first aid has top priority no matter what climate you are in.

Change your survival pattern to meet your immediate physical needs as the environment changes around you. – Modern Survival Blog

Adapt.


Top 5 Overlooked Items You Need In Your Winter Survival Kit

$
0
0

Snow_Car_Stuck

By

Every survival kit has a few holes that need to be filled, and winter survival kits tend to suffer from this more than most since they’re only used for part of the year. These top 5 picks are pretty easy to forget, but if disaster strikes you’ll be glad you had them!

5. Dry Thermal Underwear!

I have seen people who will pack an entire set of extra clothing, but leave out the bottom layer that is most important. Thermals are great for trapping air and wicking sweat away from your body, preserving body heat. If possible pack two pairs, since generally speaking thermal underwear isn’t all that bulky or heavy.

Extra thermal underwear helps keep you warm, even if you need to change out of wet clothes.

4. Emergency hand warming packs

Perhaps these seem more like a convenience, and generally they are. However, if your hands should become so cold that you can’t move them properly when you need to, a hot pack or two should help restore their dexterity. Furthermore, they can be used in conjunction with insulated clothing and blankets to add heat and keep you warm for a while longer. I recommend focusing on brands that last longer rather than having greater heat. When you’re freezing, any amount of heat will be useful and you want ones that will last as long as possible!

A few hand warmers can restore full dexterity to your hands even in the coldest weather.

3. A High-Quality Avalanche Shovel

No, not the little snow shovel for clearing your front steps off. A good avalanche shovel is made to move a lot of snow without snapping or breaking from the strain. It can be used to save people who are buried when building a snow cave, if your vehicle becomes trapped, to construct snow walls to block icy winds, and of course to save people buried by an avalanche. A little more weight in this particular case isn’t a bad thing, so go with a more durable aluminum model over the lighter plastic.

An avalanche shovel is great for many applications, including building a snow shelter!

2. Salt and Sugar

Yes, the same stuff you put on your fries or into your cakes. Sugar gives your blood sugar a boost, which can improve vision and keep your energy up. Salt can also be added to food or for an emergency electrolyte solution, but even more importantly it can be added to a small amount of water and used to de-ice in an emergency. Better still, they take up very little room and can even be carried in a coat pocket if you wish.

Salt and sugar have both proven useful in emergencies, so keep a few packets with your winter survival kit!

1. Garbage Bags

Black trash bags are awesome if you end up stranded in a snow cave, your car, or other stationary position for awhile. Simply place one garbage bag over your head, punching a few holes for your arms and head, and then put another bag over your legs without putting holes in it. This effectively acts as another thin but powerful layer that helps to trap body heat. As another plus, it is also waterproof and will help keep you dry if melting snow starts to drip on you.

A few black trash bags can help keep you warm and dry in an emergency.

Your Thoughts?

Can you think of any other overlooked items that should be in everyone’s kit? Let us know in the comments!

The post Top 5 Overlooked Items You Need In Your Winter Survival Kit appeared first on The Survival Place Blog.


The Problem with Prepping

$
0
0

BlastDoors

By

Don’t Fool Yourself into Thinking You Have Nothing to Worry About

Preppers can fairly quickly find themselves at the mercy of our own minds. We create the need and the solution in our lives by analyzing threats and weighing the likelihood of various disasters – natural and man-made and then craft plans for how we will deal with those disasters when they come. The problem comes when we analyze the disasters and settle upon a strategy that we think will either protect us completely or mitigate all of the undesirable effects of that crisis we are planning for. This is an issue that I think a lot of Preppers face and ignoring it can get you in just as much trouble as someone who has never prepped before. You might meet the same fate, just at different times. The problem with Prepping is that you can never be finished.

I thought about this as I was compiling my latest list of items that I either needed to acquire or wanted to sort out in my life. I even started to draw small boxes to the left of the items on my list so that when I had finished the various elements of my survival checklist, I could mark each box as complete. A fully completed list meant that I was done, right? That I would never have to worry about any of these particular issues again is how some people choose to look at making lists.

All I need is 6 months’ worth of food

So the grid goes down like it did in American Blackout and you are locked up snug as a bug in a rug inside your house. The power has been off for a week so far, but you have that covered. You also had 6 months of food inside your pantry so you should be all set, right? Wrong… If the power never comes back on or we descend into something worse, what happens when your food runs out? What if your brother from the next state rolls into town and starts to eat your food too?

Having a stocked pantry doesn’t mean you will live forever. In order to be truly prepared, you have to be able to feed yourself forever. Does that look like starting a vegetable garden or getting started with small livestock like raising chickens? What about Aquaponics? The process of feeding yourself and your family never stops until you die.

The idea here is that you can’t go out and buy a whole pallet of freeze-dried emergency foods and expect that you are finished. Having a great supply of food so that you can outlast most any temporary crisis can give you a huge leg up, but is not a magic bullet.

I just need an awesome Survival arsenal and I can handle anyone

I own guns and I have written several articles about various aspects of gun ownership like “The Best Gun for Home Defense” and “How to Select the Best Handgun” and another about what I consider our “Obligation to Carry Concealed“. We talk about storing ammo and the different calibers you need for different aspects of security and survival but simply having a lot of guns does not mean you will be safe.

Guns are an important part of my survival plans, but simply having one strapped to my side doesn’t or should not give me a false sense of security. This is a tool and that is all. With a firearm I will have the opportunity to react in ways that I otherwise wouldn’t. This isn’t an invisible shield against violence; it won’t protect me from dedicated bad guys or the stupid actions I may take myself. There is so much more to security than simply having a bang stick and we are all wise to temper our bravado in the face of disaster just because we bought a gun. This can go the same way for bad guys too who get cocky when they have a firearm. Just because you have a gun that doesn’t mean someone can’t walk up behind you and put their own bullet in the back of your skull.

I have backup generator

A generator is another one of those great tools we talk about often and I have one. Does that mean I will have power for the rest of my life? Nope. Actually, I would be really happy with 500 hours of run time out of the generator. I have plenty of fuel stored up and oil, but mechanical things break eventually. If you don’t have spare parts or more importantly the know-how to fix a generator, you have to look at this as a finite resource.

A backup power plan is excellent and I have one myself with further plans for solar backup, but this isn’t something I can count on to completely replace all of the power we have grown used to. Even if it was, in a complete grid-down scenario people would know that you have power unless this was hyper secret. Small chance of that with a generator but eventually everyone will know you have power and then we get back to that survival arsenal we spoke about earlier.

I have a hidden survival retreat

A well-stocked retreat somewhere deep in the woods is the Holy Grail of Prepping Legend and Lore. Seriously, I covet those who have the resources to purchase a retreat property with all of their gear pre-staged in place even more those that are able to live at their retreat year-round. Even if you do have a compound with electric fence, intrusion detection, mines, roving guard dogs, sentries in the watch towers on Barrett 50 cal rifles, that still does not guarantee you will ever live in peace the rest of your life.

That is one helluva head start though!

My point is that nowhere and no situation will stay completely safe forever. Are you possibly months, or years away from worrying about the same thing people in New York will be faced with? Perhaps, but to think you will stay hidden away forever without any other single living person coming across your path is far-fetched in my opinion. If you have this retreat, you will still have to guard against others who find out about what you have and want to separate you from your castle.

I have a Bug Out Vehicle

Great! So what? A bug out vehicle is only as good as where it can get you. If you are stranded in the city because you didn’t get out in time, what good is that vehicle? If it is parked on the highway in traffic what does that do to your plans?

Having a bug out vehicle is important; especially if you need to get to your survival retreat up above but simply having a tricked out Ford F250 running diesel or bio-fuel doesn’t mean that you can’t be stopped. Having that big truck doesn’t guarantee you won’t have some type of mechanical failure or be disabled by someone else in a big truck.

OK, so what good is prepping then?

My whole point with this article is that you can’t become complacent. My list that I was filling out was for the day, not eternity. If I buy some extra food today, that is like a deposit in the extra time bank. By having supplies I am buying myself and my family extra time, but I can’t teleport us out of any emergency that appears with freeze dried food. I can’t change the fact that the electric grid is wiped out (as an example) just because I have 500 gallons of water stored.

I have said it before and I’ll say it again. Prepping is a Journey, not a destination. You will never be completely prepared for anything. You can only work at being more prepared than you were. You can strive for being better prepared than you were a year ago. What you can’t do is think that you are done and that you can sit back and relax. Prepping is done by people who see trouble ahead and take steps to deal with that trouble. Chances are, that trouble isn’t going to go away and neither should your dedication to staying ready and striving for more self-sufficiency and resilience. You very likely will never be as prepared as you want to be, but that journey will pay you back when the time comes. – The Prepper Journal

The post The Problem with Prepping appeared first on The Survival Place Blog.

7 Tips to Keep You Alive and Found in the Wilderness

$
0
0

7 Tips to Keep You Alive and Found in the Wilderness

By Todd Walker

Get out there! Spend enough time with Mother Nature and you’ll likely experience emergencies.

Even the most innocent outings are potential survival situations. That fishing trip can turn nasty for all the wrong reasons. Your day hike may find you sleeping under the stars with a busted knee.

Always carry a minimal what-if emergency kit. With these tools, a survival mind-set, and Doing the Stuff skills, you increase your odds of staying alive and being found.

A.) Mindset Training

No matter the crisis or survival situation, your ability to come out on the other side alive is largely dependent upon your attitude. Recognizing that there will be added stress – mental, physical, emotional, and spiritual – is your first step.

Let us train our minds to desire what the situation demands. – Seneca the Younger

All your other skills will be affected by your mindset. Obviously, the more skills and knowledge you have, the more comfortable you’ll be when starting a fire to stay warm when your lost in the wilderness. Being collected enough to start a fire not only provides physical life support but boosts morale.

The more you practice skills, the more you’re attitude improves. Doing the Stuff beforehand keeps panic at bay.

B.) There’s No “I” in Team

This clever slogan adorns team t-shirts and locker room walls in the world of sport. Unfortunately, the saying won’t work on surv”I“val. There it sits, smack dab in the middle of the word!

In some cases, “I” is all you have. This scenario requires you to be a team of one – without a camera crew filming or emergency personnel standing by. You’ll have to survive on your wits and create your own ‘luck.’

C.) Resilient First Aid

Injuries happen. A scrap becomes infected. A misstep twists your ankle. Now you’ve become the doctor. All the more reason to pack a basic first aid kit. Learning basic first aid builds resilience.

The larger threat in wilderness survival situations is hypothermia and hyperthermia. Getting cold and wet leads to hypothermia. You’re ability to make sound decisions is reduced when your body’s core temp drops.

D.) Improvised Emergency Shelter

I’ve said this before, but it’s worth repeating. Mother Nature is temperamental. She likes to see how much hell you can handle while visiting her “house.”

Humans aren’t built for prolonged exposure to nature’s elements. We require shelter. We may stumble upon a cave if one is available. But one advantage we have over our furry critter friends is our ability to use logic and reason to survive.

Any crisis over a couple of hours in wet, cold conditions will likely escalate into a life-threatening setting. Shelter is more important than water in this case. Humans can only go three hours without shelter. Having experience in building emergency shelter can save your life. If you’re caught without a piece of plastic or a tarp, you’ll have to improvise and use what nature provides.

Here’s some ways to build a temporary ‘home’ in the wilderness…

E.) Fire

7 Tips to Keep You Alive and Found in the Wilderness

The ability to make fire is everything in the wilderness. This skill aids in cooking, purifying, heating, signaling, security, and comfort. Fire affects all your other physical and emotional steps to survival and rescue.

Fire is life!

F.) Signaling Rescuers

This one doesn’t get much attention but may be your best hope of being found alive. A series of 3 of anything (sound or visual) let’s search and rescue know you’re in distress. Three whistle blasts, rocks, logs, and/or fires. Use fire at night and smoke during the day. Be sure not to set the surrounding forest ablaze.

If you want to be found, leave a trail or signs for search and rescue. Leave a bandana or strip of cloth hanging from branches if ground rescue is involved. Also build arrows with natural or man-made material to indicate your travel direction.

For ground-to-air rescue, find an opening or clearing and create large signals with straight lines and 90 degree angles or circles. Use logs or rocks that contrast with the background. Build a log cabin fire setup with dry tinder and fuel in the bottom and green leafy material on top that will produce lots of smoke. Fire it up when you hear airplanes or helicopters.

Number Message Code Symbol
1 Require Assistance V
2 Require Medical Assistance X
3 Proceeding in this Direction
4 Yes or Affirmative Y
5 No or Negative N

The above chart indicates to rescue how to proceed. Use any available contrasting material to make these symbols a minimum of 3 feet wide and 18 feet long to alert aircraft.

Shiny Object Signaling

A signaling mirror or any shiny object will work to alert pilots. Reflected sunlight can be seen for several miles. For more details on signaling with shiny objects, Creek Stewart shows you how to improvise here.

Always leave the 3 W’s with a trusted friend or family member:

  1. Where you’re going
  2. When you plan on returning
  3. Who’s in your group.

[I intentionally left water and food out of this post. Well, to be honest, I’m running short on time and don’t have the energy to cover these in this post.  We’ll chew on these later.] – Survival Sherpa

Keep Doing the Stuff!

You can also connect with us on TwitterPinterest, and our new Facebook page.

The post 7 Tips to Keep You Alive and Found in the Wilderness appeared first on The Survival Place Blog.

Ice Fishing Part 1: Basics and Pole Fishing

$
0
0

Ice_Fishing

By

Finding food in winter can be difficult as most forage has rotted away or been stripped by hungry animals. However, beneath the frozen surface of many lakes lies a bounty of delicious fish swimming slowly near the murky bottom. The specialized techniques of ice fishing can help you tap into this food source, if you have the proper tools.

The Essentials

For ice fishing you can’t just find a convenient hole and plop down your standard pole and line, you need certain tools designed for ice fishing. These include:

A manual augur like this one is extremely useful for punching through thick ice.

  • Ice fishing pole. These are different from standard poles, as they are shorter and designed to give you a better feel for the lighter tugs of lethargic, half-frozen fish. Technically you can fish with a regular pole if all else fails, but ice poles are fairly cheap and the inconveniences of using the wrong kind of pole can result in unacceptable lost catches.
  • The skimmer. This is essential, as this tool is needed to scoop out rubble from drilled holes and to pull out ice as it begins to form over your new fishing spot. Essentially a sieve with a long handle, skimmers are generally very cheap and you would do well to stock several for emergency use.
  • For true survival fishing, a convenient tool known as a tip-up could be a lifesaver. Basically it is a contraption that allows for passive fishing, since it will help hold the fish on the line for you until you have the chance to investigate. They are often equipped with flags or bells that activate when the line on the tip-up is pulled, and you can easily setup multiple ice holes with tip-ups for maximum fishing efficiency.

Optionally you can also purchase or build an ice hut, which is a mobile building designed to be placed over an ice hole in order to block the wind and snow for additional comfort. Although this would be helpful in reducing instances of frostbite or hypothermia, it also leaves a much more obvious footprint while it is present which could tip off other people to your presence.

How to ice fish

Ice fishing is generally pretty simple once you have the process down. There is an element of risk, however if you do not take the proper precautions.

  1. Select a lake. Generally speaking you will need at least 4 inches of solid ice in order to have sufficient thickness to stand on it for a long time and fish. If you have a heavy wooden shelter, you will require roughly 7-12 inches of solid ice. Beware of ice with the proper depth that is extremely fragile and crackly, known as “rotten ice”, that can give way even with proper thickness. In a pinch, many fishermen will use rotten ice that is twice as thick as normal ice, so a person would need 8 inches of rotten ice and a wooden shelter 14-24 inches. I would not recommend fishing on rotten ice, period as the danger during a survival situation is far too great. A 6 inch hole will do you just fine.
  2. Set your bait and put your line down into the hole. Baits in frozen waters are generally artificial, as the chill will rapidly slow worms and grubs. When setting the depth of your bait, there are 3 schools of thought. First, you should place the bait about 3 feet below the ice. Second, place the bait about 6-9 feet below the ice. Thirdly (and most commonly) place the bait a couple feet above the bed of the lake. Each of these techniques are suitable for various kinds of fish, but many will allow that the lakebed is often teeming with fish when compared to the upper layers making it a good safe bet.
  3. Wait. Ice fishing is no different from fishing in warmer seasons. You will have a lot of waiting to do on the ice as you feel for the light tugs of the fish. Be aware that most fish in frozen lakes are very lethargic and they will not tug as sharply on your hook as you may be used to.
  4. Once you have a fish on the line, allow it to fight until you can easily pull its head into the ice hole. You don’t want to be trying to fight the fish in the hole if possible, so let it tucker itself out in the open waters underneath. Once it is in the ice hole, pull it out rapidly onto the ice so that it doesn’t get caught in the hole.
  5. Enjoy your fresh catch! Typical ice fish treasures include pan fish (which as we’ve noted previously are also less likely to ingest poisonous materials)

In the next installment we will discuss using a tip-up, as well as the different kinds available on the market. Until then, you can use these techniques to collect a nice batch of fish for the pan even in a winter survival situation. – Prepared For That

Your Thoughts?

Have you ever ice fished before? Would you be willing to walk out onto the ice and drill away for a meal? Let us know in the comments below!

The post Ice Fishing Part 1: Basics and Pole Fishing appeared first on The Survival Place Blog.

Top 10 Training Courses You Should Take Right Now

$
0
0

training-courses-header

By Brian Meyer

Prepping is more than having a room full of food and supplies, it’s also about skills. All the food, weapons, and supplies in the world will only get you so far if you don’t have the skills for survival. A first-aid kit is great, but if you don’t know how to perform first aid, it loses most of its usefulness.

There are classes available all around the country that help with learning the skills needed for survival, and most aren’t even listed as survival, but just as quality of life skills everyone should know. Check out the list of the top ten training courses you should be taking right now and learn a new skill.

1. Red Cross First Aid and CPR

 red-cross-training

These classes can literally be a lifesaver. Taking a first aid class can give you the skills you need to survive and not only help yourself but also help others.

The class involves learning how to respond to common first aid emergencies including burns, cuts, and injuries to the head, neck, and back. If you have kids there is a pediatric version available, too.

Along with first aid are classes on CPR. These can help teach you the proper way to give someone CPR, or cardiopulmonary resuscitation. Trying to do this without the proper knowledge is a good way to kill someone, so make sure you take the time now to learn the proper way.

2. LDS (Mormon) Canning Classes

canning-skills

No matter your religious beliefs, the Mormons are often glad to help teach the art of preserving and canning food. The storing of food for emergencies is a belief they hold closely, so it’s no wonder that they are skilled in the art of canning.

Visit a LDS Cannery close to you for classes and information. Most are free and open to the public with an appointment. Check out this site for a list of LDS Cannery locations.

3. ARRL Amateur Radio

amateur-radio-survival

When the SHTF it’s not likely that there will be cell phone or even landline service for the foreseeable future, which means alternate forms of communication will be vital to survival.

Learning the art of amateur radio operation now can give you an interesting hobby as well as give you the skills you need to communicate in grid-down situations. The ARRL association for Amateur Radio is a great place to learn what you need to be skilled at using amateur radios as well as get certified so you can legally operate one today.

4. NRA Gun Training

 nra-gun-class

The National Rifle Association, or NRA, offers a variety of gun classes ranging from basic gun training and hunting, to youth programs and even gunsmithing. If you’re serious about security and safety in regard to firearms, these should be the classes you take.

Having a gun isn’t enough to protect you and your family. You need to know how to use it safely and correctly as well. Learn these skills now and you’ll be much better off when you need to use them.

5. Spinning/Weaving Classes

spinning-weaving

In a survival situation it’s a pretty safe bet that the Wal-Marts and malls will be out of business. This means any clothes you need will have to come from yourself or bartered for. Learning how to make your own clothes and to do repairs on the ones you have is just as necessary as any other skill you prepare to use.

There are tons of local clubs and community college classes that will teach this, so your best bet is to look at the local community college or community center for a class. This will probably cost a few bucks, but it’ll be money well spent.

6. Candle and Soap Making

candles-soap

Making your own candles and soaps can be a fun hobby to have, and can even be a great gift idea for friends and family. The best part about this is that when the SHTF you’ll be able to make your own soap and candles to keep you and your family clean and well lit.

You can learn how to make soap and candles from sites on the Internet as well as at local craft stores.

7. Gardening Classes

garden-club

In long-term survival situations you’ll need to know how to grow a variety of fruits and vegetables to keep your food supplies stocked. You can even use these skills now to help build up your food stores by canning the leftovers.

These classes and clubs should be fairly easy to find by checking out a local community center or community college. There are more than enough books and sites on the Internet about gardening as well. National Geographic even has a special on how to make a secret, hidden survival garden, a real plus for survival situations where you want your food hidden.

8. Backpacking Club

backpacking

Knowing how to properly backpack and camp is a skill that will be invaluable in survival situations. There is far more to backpacking that walking around the woods with a large backpack on. By joining a backpacking club you can gain skills and information that you might not pick up on by reading alone. Best of all, you get to talk to other backpackers and see what skills they have.

Check out local community centers and outdoor shops for information on clubs and classes. Some retailers will offer classes free of charge to members or even the general public.

9. FEMA/CERT Training

fema-cert-training

FEMA/CERT training is what people that do emergency response and rescue take to make sure their skills are up to any challenge. These are great for the average prepper, too, as you will need to be your own emergency response unit when things go bad.

Check out FEMA’s website for more information and training manuals. These should be a great place to start.

10. Shop Class for Adults

adult-shop-class

Most community colleges offer some form of shop class or industrial skills class that you can sign up for and take. These usually cost a fee, but in them you can learn everything from welding to auto repair to woodworking.

Take as many of these classes as you can, as the money you invest will come back to you in both the short and long term. Immediately you can use these skills to help around the house and in the future you can not only care for your own house, but also barter and trade your skills to get things you need while helping your neighbor.

Wrap-Up

There are probably a hundred more skills you can learn to help survive, but these are a great place to get started. Too often prepping with food, weapons, and general supplies overshadow the most important part of a survival plan: yourself.

Improve yourself as much as you can now while information is easily accessible. When things get bad, you’ll have a much harder time finding someone to teach you these skills, and the thought of using the Internet to find your answers will be a dream. – Survival Based

The post Top 10 Training Courses You Should Take Right Now appeared first on The Survival Place Blog.

10 Drills To Make You A Skilled Concealed Carrier

$
0
0

concealed carry drill

By Ben W – Off The Grid News

You’ve chosen to carry a weapon concealed for your personal protection and that of your family.  But you’ve eschewed specialized training and chosen instead to rely upon your personal knowledge, the stuff you have read in written self-defense and firearm publications, and the common sense that has gotten you to this point in the first place. After all, mama didn’t raise a fool. You’ve been pretty successful at staying alive to this point, so the following is intended as a basic guideline to enhance your current set of skills.

The following is what I call the 30-round defensive shooting scenario. Grab an IDPA target, 60 or 90 rounds and get to the range. If you can get someone to time your shooting, it’s helpful (specifically if they have a stopwatch or a competition timer). This helps keep you on your toes and gives you effective training.

This type of training is a live-fire exercise and should be performed where you can shoot without concerns for safety (and only after you are confident in your safety protocols). You can perform these drills with a revolver or a semi-auto handgun. Just make sure to have reloads to practice that aspect of your defensive shooting.

Drill 1

Take a position at 5 yards with a low-ready position (unholstered). This drill is not to specify that you ought to use a headshot at this range, but rather to help you learn target acquisition at a short range quickly and with a good focus and size range. You will want to shoot within 1.5 seconds to hit the target in the triangle or head region from a ready position. Repeat the shot 3 times to get comfortable with it before moving on.

Drill 2

Position at 5 yards with a 2-second window from a holstered, semi-ready position to simply focus on drawing and firing at the triangle (the area in the upper chest to nose region), or the headshot. Same area of focus (triangle/head) and you will also repeat this for a total of three shots.

Continue reading at Off The Grid News: 10 Drills To Make You A Skilled Concealed Carrier

The post 10 Drills To Make You A Skilled Concealed Carrier appeared first on The Survival Place Blog.

Ice Fishing Part 2: How to Build and Use a Tip-Up

$
0
0

Tip-up

Read the entire series! Part 1

 By Josh

Previously we discussed some of the methods commonly used for ice fishing when you have the luxury of being there and tending to the line. In this post, we’re going to look at how to build and use a tool known as a tip-up that helps to “watch” your fishing hole for you.

Many designs, but all with a similar principle

The basic idea of a tip-up is a mechanism that can do two things:

  1. Hold onto your line for you until a fish grabs it, whereupon it will spool line off of the reel.
  2. Once a fish begins pulling on the line, it will tip up a flag, ring a bell, or give some other indication that a fish is on the line.

Any contraption that you can build and put on the ice that accomplishes these two tasks will suffice for a tip-up. You can setup multiple tip-ups at different areas and depths in the lake or pond in a survival situation, but be aware that in any other case your local government may have a limit on how many you can have working a single lake.

Tip-ups have the advantage of only requiring your help to keep the ice hole clear and to pull in fish once caught. The disadvantage is that you may lose stronger fish that could have been easily caught with a manual fishing style, and tip-ups are fairly obvious indications of human presence complete with obvious flags and ringing bells. If you’re trying to be discrete and only need a few fish at a time, stick with the pole but if you need large amounts of fish tip-ups increase can vastly your catch.

Types of Tip-Ups

Beaver_Dam_Tipup

  • Rectangular Tip-Ups (sometimes known as a Beaver Dam design) lie flat on the ice above the hole and have string wrapped around a small spool that is actually placed into the hole. As the spool turns, it loosens the flag until it tips up and alerts you. These are simple to make at home and extremely stable on the ice, but they do tend to get lost if snow actually drifts over the lake. For a preparedess minded person, they have a low profile that is easy to hide when the flag isn’t up, making them very discreet.
  • The rounded hole tip-up design actually fits in the hole and uses a similar spool spinning mechanism to the Rectangular tip-ups. The key difference here is that since the device itself is placed at the top of the hole it can help keep it from freezing over in the short term, though some fishermen have complained that if left for a day or more they can freeze in place overnight, making them difficult to remove without damaging them.
  • The “Classic” design is one that is extremely light, simple and portable. Made of three pieces of wood held together with butterfly nuts, the classic is unfolded by loosening the nuts and formed into a rough “T” shape. Rather than relying on the spinning motion of the spool, the flag is released when the line is pulled off of a hook by the fish, releasing the flag to tip-up and become visible. These are generally very cheap to purchase, easy to setup, and extremely portable. However, they can be toppled over if improperly setup and do not keep the hole clear.

Each of them has different uses and all are suitable for a survival situation. If purchasing I recommend focusing on durability since these tip-ups tend to be made of portable, light materials such as thinner wood and plastic that can break easily on lower quality models. If properly cared for, however, a durable tip-up can last for many fishing seasons and provide you with a bounty of fish. – Prepared For That

Your Thoughts?

Would you buy a tip-up or build one for yourself? Would you use a tip-up in the first place? Let us know in the comments below!

The post Ice Fishing Part 2: How to Build and Use a Tip-Up appeared first on The Survival Place Blog.

Selecting the Right Compass

$
0
0

compass

By Jeremy Knauff

The compass has been a tool of great importance for centuries. Every navigator considered it a crucial part of his or her arsenal, and for good reason. The world is a big place, after all, and one can become easily lost without the ability to find the four cardinal points. As technology has evolved the compass has seen various adjustments in size, utility, and efficiency. Today’s mobile phones are even capable of performing the duty of a compass. A wise route-finder, however, will want to recognize that such a medium is readily prone to elemental damage. Real compasses are still the most reliable option. There are three traditional archetypes available for staying on course today:

Lensatic compass

Lensatic CompassThe most robust style on the market; a lensatic compass can withstand formidable abuse. The majority come with aluminum framing—preventing rust—and particularly durable plastic protecting the instrument itself. Adding to the virtual immunity to elemental damage, these models often offer photo-luminescent technology enabling visibility in low-level lighting conditions. The lensatic sight can also be used to determine an objective’s exact bearing. This is the most dependable model for the survivalist – made apparent by its ubiquitous tradition amongst armed forces units. These benefits do not come without a price, however, as the user must sacrifice utility for a rather unwieldy size. This is not a compass that can be tightly compacted and slipped into a small space. Though its immense utility certainly makes up for any shortcomings.

Map compass

Map CompassThe map compass is very refined and primarily designed to permit extreme precision. These models tout a protractor feature and a transparent base. When used in conjunction with a map, the protractor enables a taking of bearings directly from the paper itself. The rectangular shape can make this model cumbersome if it becomes awkwardly positioned in a large pocket, but its flattened side-profile certainly offers advantages of its own – permitting storage in tight pouches. Nearly all models of map compass will have a lanyard; this permits an easy method of attachment via jacket button holes or belt loops whilst carrying.

Compact compass

Compact CompassThe advantage of a compact compass is that, by its very nature, it is designed around being easy-to-store and carry with you. The quality isn’t going to be nearly so great as the other options, but will be quite sufficient for the novice outdoorsman, or suburban enthusiast. The main function of this model is to provide you with an ordinary bearing, and it performs that function adequately. With the compact compass there is no ability to finely determine direction, but that is seldom a problem for those who are engaging in day trips of no more than a few miles, occasional campers, or hunters.

The type of compass you choose will be entirely up to your individual requirements. There are numerous models available that almost universally fall into one of the three above-listed varieties. Each has their strengths and weaknesses, but all are effective. – How To Survive It

The post Selecting the Right Compass appeared first on The Survival Place Blog.


5 Prepping Skills You Can Learn From Zombie Movies

$
0
0

zombie-survival-header

By Brian Meyer

Everyone loves a good zombie movie. With zombies on TV, in the movies, and just about everywhere else, you might suspect that the zombie apocalypse has already started.

In reality, though, zombies are just a work of fiction. There are more than enough scenarios out there to worry about that actually have a chance of happening. There are some people out there prepping for just such an outbreak, but while this is pretty far-fetched, there are some solid prepping skills to be learned from zombie preppers and zombie movies.

1. Weapons

zombie-survival-weapons

If you’re familiar with zombie movies or TV shows like The Walking Dead you know that ammunition will run out at some point. The big difference between movies and real life here is that the starts of the movie pick up hand weapons and just magically know how to use them, the truth couldn’t be farther from this idea.

Learning any weapon takes time and practice. Too many preppers spend all their time learning how to shoot and ignore bladed and blunt hand weapons. Learn how to properly wield a machete, sword, or even a basic knife if a self-defense class and you’ll be much better rounded in any situation that a weapon is needed.

With learning hand weapons, make sure you learn all there is about firearms as well. A good reloading class can mean the difference between having ammo and running out. Guns are still important, but other weapons can be just as necessary, especially when the ammo runs out.

2. Mobility

zombie-survival-mobility

If you subscribe to the slow, lumbering zombie idea then you know that zombies generally only kill people when they let themselves get cornered or don’t have a good escape plan. Even though the real risk of zombies is pretty low, this idea is still important.

You need to know how to escape where you currently are, and should have at least two ways of doing it. Make sure you can be mobile as quickly as possible using both motorized and foot travel.

Keep all of your gas tanks as full as possible during daily use. You don’t want to be running from zombies or looters in a car with an empty fuel tank. When things go bad, you don’t want to be one of those people waiting in line at a gas station, fully open to attack. In an emergency where cars still work gas equals freedom and safety.

3. Defense

zombie-survival-defense

Some say the best offense is a good defense, and in this situation it’s totally correct. Zombies are fairly silent when alone, which makes it easy for them to sneak up on unsuspecting survivors and bite them. The same goes for looters and other people that can harm you or your family, minus the biting, maybe.

Wherever you are, set up a good perimeter defense and warning system. Make sure there’s at least something to warn you of attack. That could be trip wires tied to cans that rattle, or someone watching a road for travel on it. Ideally a combination of these is the best option.

Make sure you have a defense plan before you need to enact it, too. Think of the situation like you were a zombie or looter and think how you would approach. BE aware of what direction civilization is, as most people will come from that direction, and always look behind you.

4. Operational Security

zombie-survival-opsec

In this situation OpSec is less about letting others know your plans and more about protecting what you have. Don’t let your full defenses show unless absolutely necessary. Keep as quiet as possible and keep warning signs like smoke as invisible as you can.

In the movies a zombie can easily hear for a mile and will alert his friends that there’s a buffet waiting for them. The same goes for regular people in survival situations, too. If you’re in a valley that carries sound, you should be aware of that. You’ll need to make a fire at some point, so try to hide the smoke as much as possible.

Keep yourself and your survival as close to the vest as possible and less people will know you’re out there, which is a good thing no matter if the other people are alive or the walking dead.

5. Water and Food

zombie-survival-food

There isn’t a disaster scenario in which water and food isn’t important. The CDC even has a zombie preparedness page that, while far-fetched, has valuable information in it. In a zombie outbreak, water and food supplies could become tainted, making it very valuable for you to have your own saved up.

Replace “zombie outbreak” in that sentence with any other disaster and it still rings true. You should make a survival plan and store up enough food and water to work around that plan.

Natural disasters happen a little more frequently than zombie outbreaks, so planning food and water to get you through one of these is the best idea, and it’ll even help with zombies. Just like with having a full gas tank, you don’t want to be that person running for the grocery store when something bad happens. When times get tough most people get ruthless, and honestly, almost zombie-like. Keep yourself out of a potentially bad situation and have your water and food stores already set before you need them.

Wrap-Up

The idea of the dead walking the streets looking for brains to eat is indeed a scary idea, and for the sake of preparedness you shouldn’t rule anything out, but you’re far more likely to be in a survival situation with less supernatural beginnings and more explainable ones. This doesn’t change the need for prepping, however.

If you want to prep for a zombie outbreak, I say go for it, as long as you’re planning smartly and with other scenarios in mind, you’ll be as safe as possible. – SurvivalBased

The post 5 Prepping Skills You Can Learn From Zombie Movies appeared first on The Survival Place Blog.

SURVIVAL – How To Survive

$
0
0

definition-of-survival

By Ken Jorgustin

To survive under difficult or threatening circumstances requires a set of instincts, knowledge and actions working together for success.

Don’t be fooled into thinking it’s a simple thing…
 
S ize Up the Situation
Size Up the Situation, Surroundings, your Physical Condition, and your Equipment.

U se All Your Senses, Undue Haste Makes Waste
You may make a wrong move when you react quickly without thinking or planning.

R emember Where You Are
Always try to determine how your location relates to ‘the enemy’, ‘friendlies’, local water sources, and areas that will provide cover.

V anquish Fear and Panic
The greatest enemies in a survival situation are fear and panic.

I mprovise
No matter how complete a survival kit you have with you, it will run out or wear out after a while. Your imagination must take over when your kit wears out.

V alue Living
Stubbornness, a refusal to give in to problems and obstacles that face you, will give you the mental and physical strength to endure.

A ct Like the Natives
The natives and animals of a region have adapted to their environment. To get a feel of the area, watch how the people go about their daily routine. Learn how to adapt to their (humans and animals) environment and increase your chances of survival.

L ive by Your Wits, But for now… Learn Basic Skills
Survival training reduces fear of the unknown and gives you self-confidence. It teaches you to live by your wits. Learn these basic skills now–not when you are headed for or are in the ‘battle’.

 
Pattern For Survival
Develop a survival pattern that lets you beat the enemies of survival. This survival pattern must include food, water, shelter, fire, first aid, and signals – placed in order of importance.

For example, in a cold environment, you would need a fire to get warm, a shelter to protect you from the (cold, wind, and rain or snow), a means to get food, a means to signal for help (if you’re looking for it), and first aid to maintain health.

If injured, first aid has top priority no matter what climate you are in.

Change your survival pattern to meet your immediate physical needs as the environment changes around you. – Modern Survival Blog

Adapt.

The post SURVIVAL – How To Survive appeared first on The Survival Place Blog.

Viewing all 77 articles
Browse latest View live